Request to Customer Support
Incorrect nickname or password
Fill all fields
Captcha error
Error
The router will upload the file, install it, and reboot automatically. This process takes roughly 3 to 5 minutes. Do not refresh the page or turn off the device. 5. Post-Update Best Practices
If you run into any issues during the flashing process, please let me know: What or behavior are you seeing?
The process is straightforward when you have the correct file and follow a disciplined approach. Always verify your hardware revision, use a wired connection, never interrupt power, and always perform a factory reset after the upgrade.
Ensure your power supply is stable. A sudden power loss during the upgrade can ruin the router.
Once the router boots to the login page, log in and immediately perform another . This clears old nvram variables that can cause instability.
Assign a static IP address to your computer's ethernet card (e.g., IP: 192.168.1.10 , Subnet: 255.255.255.0 ).
Updating your router's firmware can bring numerous benefits, including:
After the router reboots, log back into the web interface. Check the top right corner of the page or the Status page to confirm that the has changed to the version you just installed. Also, verify that your internet connection is working and your custom settings (like Wi-Fi password) are still active.
Ensure your router and computer are connected to a stable power source. A power outage during a firmware flash can corrupt the device permanently.
Updates often resolve internal memory leaks that cause the router to freeze or drop wireless clients when multiple devices connect simultaneously. Crucial Pre-Requisite: Verifying Your Hardware Version
To ensure that old configuration files do not conflict with the new firmware architecture, it is highly recommended to factory reset the device after an update.
Never update firmware over Wi-Fi. A sudden signal drop can interrupt the process and corrupt the router.
If it is a compressed archive, extract it. The actual firmware file you upload to the router must end in a extension. Step 2: Preparing Your Setup for a Safe Update
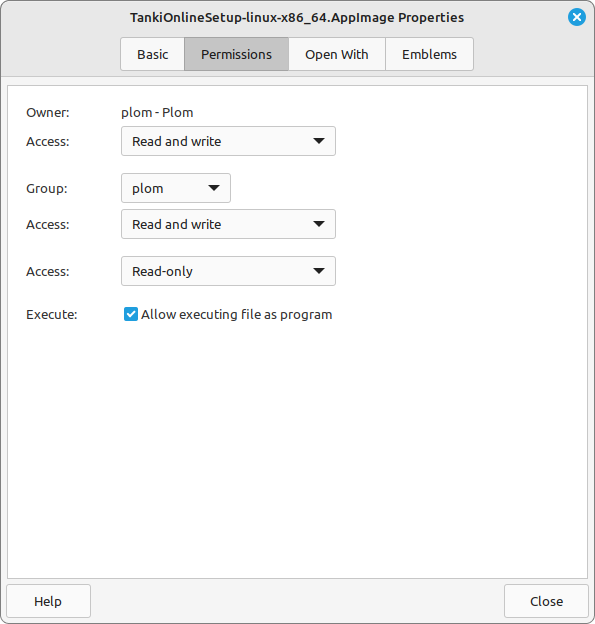
In order to make the game work, enable the «Allow executing file as program» in the app's properties.